Notes Tab
Add or edit notes related to a reference customer on the Notes tab. Notes can be used to capture historical activity, miscellaneous information, customer status updates, etc. Notes are a central place for team members to view customer touchpoints and create tasks with due dates to receive email reminders. When a new task is created, a note is automatically added to the customer Notes tab with a Note Type as Task Creation.
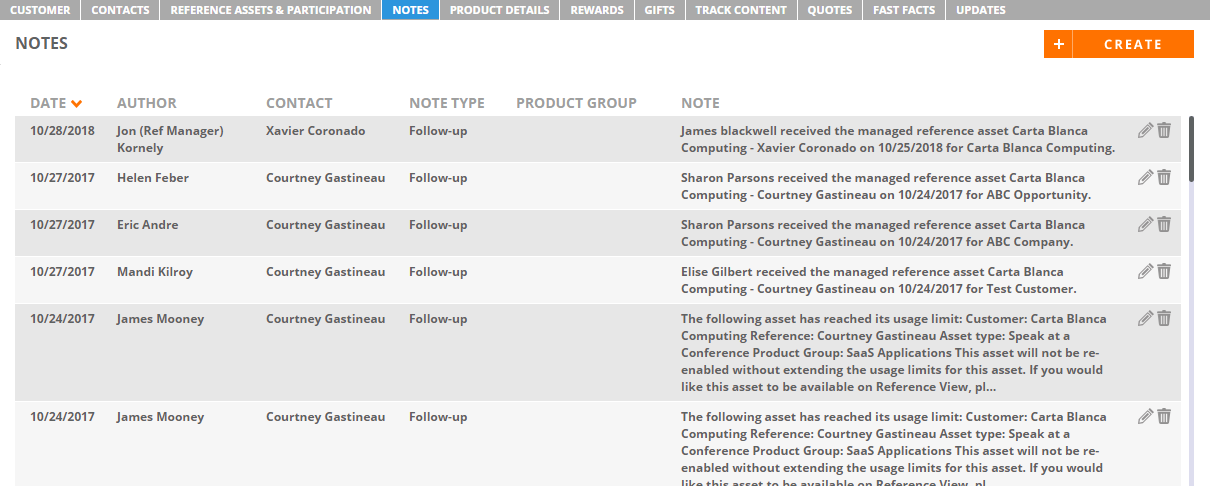
Viewing Notes
- To view or create new Notes, perform a search and view the results on the Customers tab. Click the Edit pencil to update any information found on a particular customer record.
- Navigate to the Notes tab.
- View any available Notes.
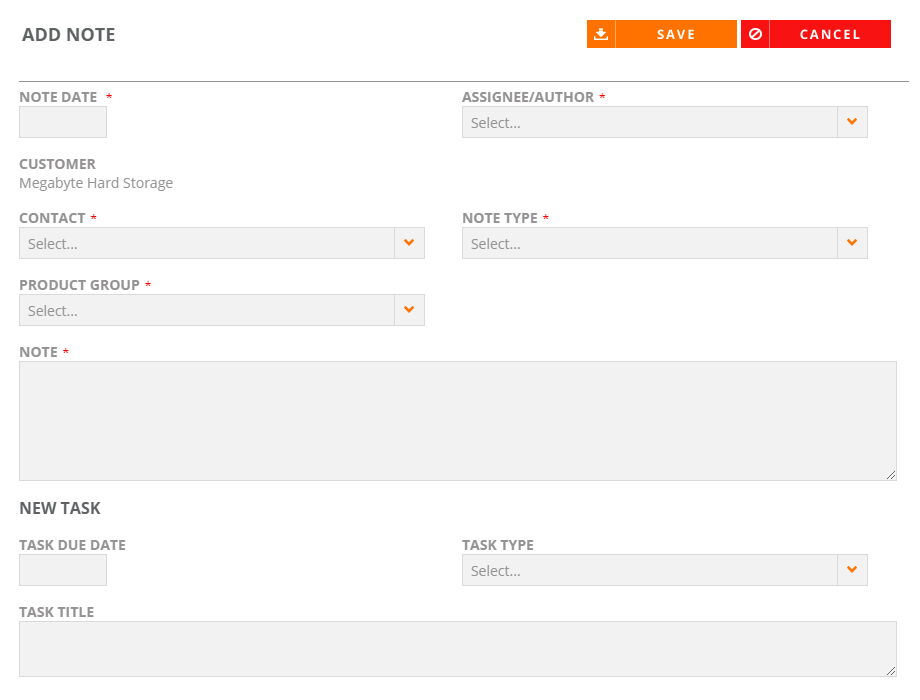
Adding Notes
- Click Create.
- Add your note information. Fields marked with an asterisk are required.
- Note Date: Click in the field and select the note creation date from the calendar.
- Assignee/Author: Select the assignee and/or author of the note.
- Contact: Select the contact associated with this note.
- Note Type: Select the type of note being added.
- Product Group: Select the product group associated with the note. This is an optional configurable field.
- Note: Enter the customer note (e.g. contact is always unavailable the last 2 weeks of December).
- Task Date: (Optional) Enter the note task date if you want to create a new task related to the note.
- Task Title: (Optional) Enter the note title if you want to create a new task related to the note.
- Task Type: (Optional) Select the type of task if you want to create a new task related to the note.
Note: If the Task Date and Task Title field are not populated, the note will be associated with the customer account but will not appear in the Tasks.
- Click Save. When a new note is created, as well as a new task from the Notes area, the new task will be displayed in the Tasks grid.
Note: To delete existing notes, click the Trash icon.
Editing Notes
- Click the Pencil icon.
- Edit your note information. Fields marked with an asterisk are required.
- Click Save.
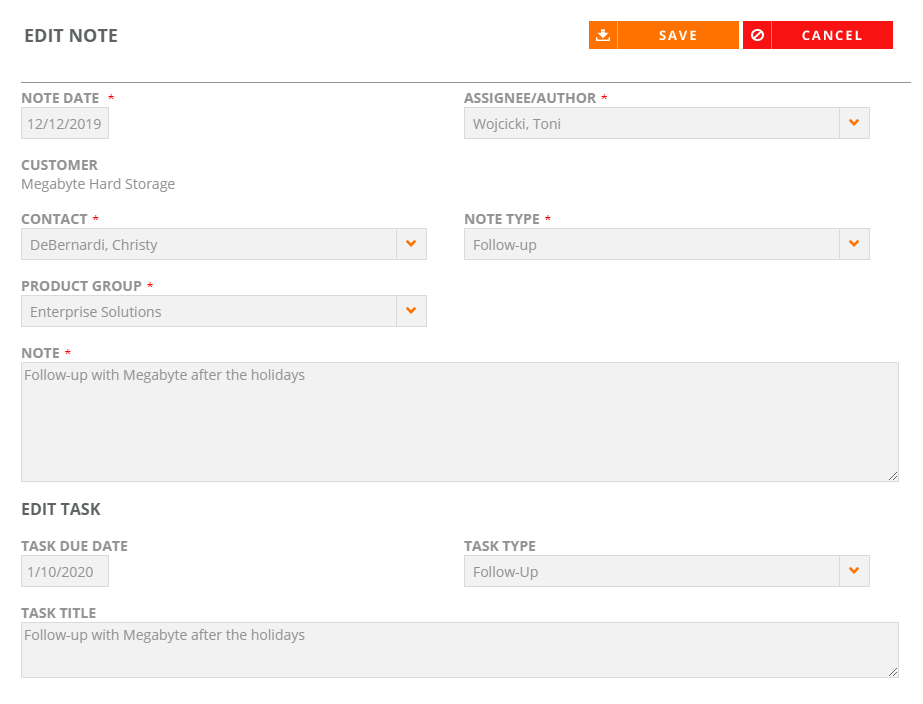
Note: Click the Return to Search button if you are finished with your edits and wish to return to the search results page.